Gift Bag Tutorial
I love making gift boxes, so I thought I'd attempt a tutorial! Hopefully you can follow along and it makes a bit of sense!
First, take a piece of 8.5" x 11" sheet of card stock. Put the 8.5" side up against the top of your trimmer. Now, move the paper so the edge of the card stock rests at 2". Score. Turn the card stock around so you are able to acore at 2" on the opposite end. You should have a piece of card stock that is scored at 2" on each side.
Next, place your card stock so the 11" side is against the top of your trimmer. Move the card stock until the edge rests at 4". Score. Turn the card stock so you are able to score at 4" on the opposite end.
Now, take scissors and cut the middle lines, stopping at the center score line.
Fold up all the score lines:
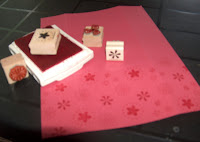
I turned the card stock over and stamped the outside of my box.
I cut 2 pieces of white cardstock 4" x 2.5" and stamped at will. I adhered the white pieces to the front and back of the box.
Take sticky tape and put a strip along both sides of the white cardstock:
Cut 2 pieces of ribbon 15" each. Beginning at the bottom of one side of the white cardstock, place the ribbon on the sticky strip. Bring it toi the top of the box, then down the other side. Do the same to the other side of the box. This makes your handles.
Fold the box up and use sticky tape to adhere the sides together.
Decorate at will!


23 comments:
Thanks for posting that - it looks so easy! You did a great job!
This is TOO cute! Thanks for the awesome tutorial!!
This was really easy to follow your directions. I am very excited to give this a try. I am hoping to do one in a little bit after my son takes a nap. If I get it done I will post a link to the picture. :) Thanks.
Awesome tutorial Michelle! It's very easy to follow! I love the design of the purse/box and the colors that you used!
This is so cute - thanks for sharing the excellent tutorial!
Scrappintrish, that would be wonderful!
thanks, you guys! I was worried my "instructions" mwouldn't make any sense. I'm not good at explaining things...but I hoped the pictures would help!
Michelle- You did an awesome job! I tried it out and guess what - IT WORKED!! I'll send you a pic tomorrow :)
Excellent tutorial girlfriend ;)
Jen
What a great tutorial for these adorable bags! Thanks so much for taking the time to do this!!
It's a great tutorial - the only thing it lacks is the dimensions of the final product, which happens to be 4 inches tall, 4.5 inches wide, and 3 inches deep.
Now, to ponder what one might put in a bag of those dimensions...
Hi, It's me again. I just posted a picture of my bag that I did tonight. It's not as good as your's but I tried. :)
Here is the link to my Blog if you would like to check it out.
http://www.misstrish.blogspot.com
Michelle, I adore your blog... this tutorial is awesome!
You've been holding out girl! This is just too cute. I will have to give this a go. Adorable!
Thank you for sharing the tutorial! Beautiful little bag! I make card totes just like this, only change the scoring marks to 1-1/4 inches along the sides and 4-1/2 inches deep. An A2 card fits very nicely in these. I like to use the One or Two Sheet Wonder idea and make gift sets. There are a couple on my Webshots site: http://community.webshots.com/user/kayellmt
Love your blog! :)
Karen
This is amazing! I will be bookmarking this one, for sure. Now I need to find myself a scoring blade for my trimmer. hmmmm...
Btw, check my blog... I finally used the punch to "took" from you in May. Thank you so much for parting with it. I LOVE it.
Me again... you should submit this one, too!!
Oh thank you for this tutorial! I am so going to try this when I get home from work. :)
Thank you so much for posting those instructions! That is way too cute, I am definitely going to be making one (or ten)!
What a great tutorial and adorable box. Thanks for the ideas. Linda
Thanks for the tutorial. The box is sooo cute. I'm going to have to give it a try.
I love it! I've been saving your link forever now so I could make bags for my kids' birthday party. Hop on over to my blog to see! Thanks for sharing!!!
Oh wow this is so fabulous thanks so much for sharing ,love it ,Dawnx
Fantastic tutorial! I love how you did the ribbon handles. Just gorgeous! :O)
Nice gift bags tutorial. Good collection. Thanks for sharing information.
Post a Comment